10 Round Trimming Tutorial

Some Vepr 10 round magazines are made from the factory by cutting and 8 and a 2 round magazine and gluing the respective parts together with a dupont rubber coat and adhesive. This causes to the junctions between the two joined magazines to not always be flush which leads to the follower getting stuck after the 7th round has been inserted.
This tutorial attempts to provide a solution for this problem.
Step 1.) First, attempt to push the follower down fully either by inserting a long rigid rod, or by inserting 10 snap caps. If you can push the follower fully, congratulations you can skip the remaining steps, if not go to step 2.
Step 2.) Take apart the magazine. To do this flip the magazine upside down, and push the button in the center of the base plate with a rod or something thin and rigid enough to overcome the force of the spring tension. Then slide the plate out carefully, being cautious with the bracket that’s attached to the spring as the spring itself is under a good amount of tension and if not careful can fly out.
Step 3.) Remove the spring and detach the follower from the spring.

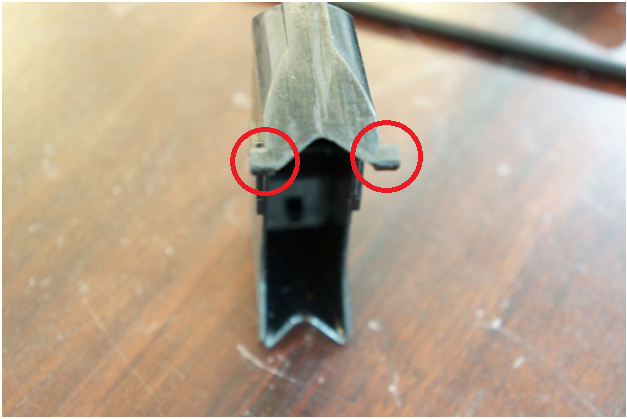
This is what the follower should look like and if you notice the rear legs of the follower you can see that there are some marks on it. This is due to the follower being forced past the junction where the two glued together magazines meet. The trick is to blunt or smooth this area enough so that it doesn’t get snagged in the junction between the two glued together magazines.

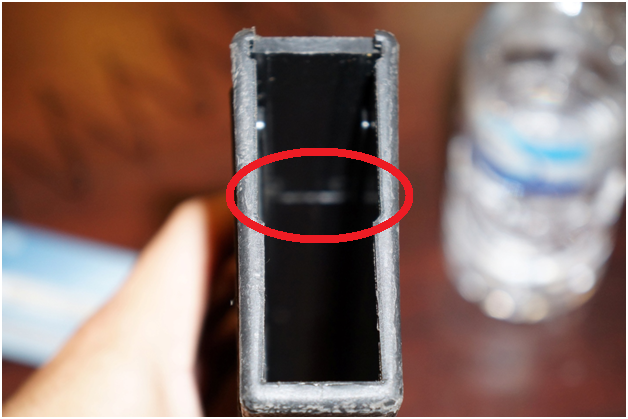
Here you can see the junction where the follower becomes stuck.
Step 4.) With a file, or a rotary tool carefully blunt the legs of the follower. One merely needs to profile the legs so there are no hard points on the follower. This prevents the tendency for the follower to get caught in the junction.

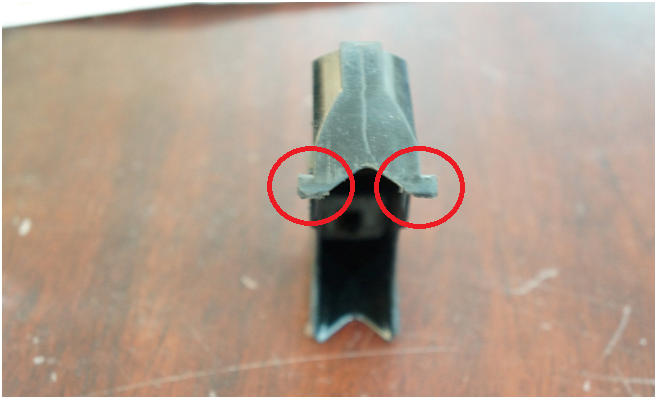
Here is a picture of the follower with the legs trimmed to avoid any sharp edges. The difference in appearance is subtle but the function is vastly different (you can easily load 10 rounds with this follower as opposed to the previously illustrated one).
Step 5.) Reassemble magazine back together in the reverse order you took it apart in.

